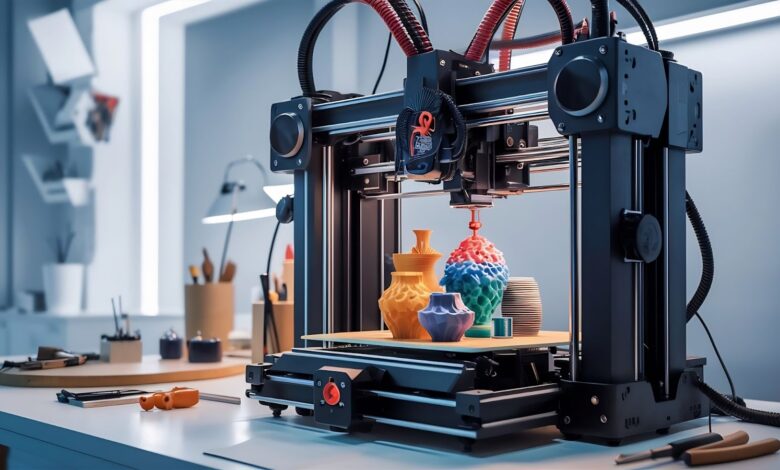
Look, if you’re a product designer, startup founder, engineer, architect, or small-scale manufacturer in the Bay Area. When you’re searching for the right 3D printing San Francisco partner, you’re really hunting for someone who gets it, someone who understands tolerances matter, finishes make or break presentations, and your constraints are real.
San Francisco’s hardware ecosystem is unusually concentrated, which gives you advantages that other cities can’t match local pickup, face-to-face consultations, and rapid iteration cycles. But only if you choose a shop equipped to deliver on those promises. You’ll also want someone who handles NDAs without making it weird and genuinely understands startup realities.
This blog cuts through the noise. We’re focusing on what actually moves the needle: process capabilities, material variety, dimensional accuracy, finishing options, realistic turnaround times, and pricing that doesn’t hide fees in fine print.
Matching San Francisco 3D printing services to your actual project needs
Let’s get practical. Your project type whether it’s an early prototype, custom one-off, or small production batch determines which printing approach makes sense. Understanding where you are in the development cycle matters. Here’s how to nail the earliest, fastest stage: rapid prototyping.
Choosing the right 3D printing partner in San Francisco starts with evaluating technical capabilities, material expertise, and turnaround reliability. A dependable 3d printing service in San Francisco should offer clear guidance on file preparation, precision tolerances, and production scalability. When a service combines advanced equipment with consultative support, it becomes a true production partner rather than just a print provider.
Fast design iterations through rapid prototyping San Francisco workflows
Testing concepts? Checking how parts fit together? Building enclosure mockups? Then rapid prototyping San Francisco services that prioritize turnaround over perfection are your best bet. FDM can deliver draft models within a day. SLA provides detailed visual prototypes in about two days. SLS and MJF produce genuinely functional parts in three to five days, tops.
Here’s a tip most people miss: don’t order prints one at a time. Ask about iteration packages that drop your per-part cost when you already know multiple revisions are coming. Many providers offering 3D printing service San Francisco capabilities will quote recurring prototype batches at better rates than single orders.
Once you’ve validated your concept through quick iterations, you’re ready for custom builds that require more precision than speed.
Custom 3D printing San Francisco for specialized, functional pieces
Think jigs, fixtures, mounting brackets, replacement components, custom props these fall squarely into custom 3D printing San Francisco territory. These aren’t throwaway prototypes. They’re working tools or final pieces that need to be performed.
Your quote should spell out orientation strategy, support-removal approach, post-processing steps, and specific finish expectations. If a vendor tosses you a price without discussing these details? They’re guessing, not planning. Custom work demands precision in both execution and communication.
When your custom prototypes prove the concept and you’re scaling beyond one-offs, it’s time to think about production-level consistency.
Production runs from a reliable 3D printing company San Francisco
Bridge manufacturing that sweet spot of producing 10 to 500 units before committing to injection molding tooling requires a 3D printing company San Francisco with consistent quality control, traceable materials, and repeatable processes. You should receive proper documentation: Certificates of Conformance, material certifications, the works.
Pilot builds and field-test batches can’t tolerate variation between parts, so ask how they guarantee repeatability across production runs.
What to actually evaluate when choosing a 3D printing service San Francisco
Knowing your project category narrows your options but selecting the right provider means evaluating six critical factors that separate mediocre shops from exceptional ones.
The most important technical choice? Matching the right print process to your part’s geometry and intended function.
Choosing between FDM, SLA, SLS/MJF, and metal processes
FDM is budget-friendly and durable but leaves visible layer lines. SLA and DLP create smooth, highly detailed surfaces, though the resins can be brittle. SLS and MJF print robust nylon parts without needing support structures ideal for functional components. DMLS and SLM deliver metal-level performance but cost more and typically require post-print machining.
Ask this upfront: “What are your process limitations regarding minimum wall thickness, hole accuracy, and warping risk?” Their answer reveals whether they truly understand their equipment or just process orders.
Picking the right process is foundational, but material selection determines real-world performance.
Material selection: performance requirements, heat tolerance, UV resistance, chemical exposure
Your options include PLA, PETG, ABS, Nylon (PA12), TPU, carbon-filled composites, various resin families, and metals like aluminum, stainless steel, and titanium. Request material datasheets, flame ratings when relevant, biocompatibility certifications for medical uses, and outdoor durability specifications.
Interesting industry note: the PA12 market is projected to expand from USD 1.49 billion to USD 2.47 billion by 2034, reflecting growing demand for high-performance polymers in functional applications. More options mean more complexity. A knowledgeable vendor becomes invaluable here, guiding you through material tradeoffs.
Dimensional accuracy gets your part within specification, but surface finish determines whether it looks prototype-rough or presentation-polished.
Post-processing and surface finish capabilities matter more than you think
Compare shops based on support-removal quality, sanding, bead blasting, vapor smoothing, dyeing, painting, and polishing capabilities. Request photo samples showing different finish levels and define what “acceptable” means for instance, no visible layer lines at 30 cm viewing distance.
Finishing quality varies dramatically between providers, so never assume it’s included without explicit confirmation.
A beautiful finish impresses clients visually, but structural integrity prevents field failures here’s what to ask about strength.
Strength considerations, durability expectations, and orientation strategy
Ask your service to explain their approach to layer orientation, infill patterns, shell counts, and anisotropy risks. For load-bearing applications, request their “failure mode expectations” and any recommended design modifications.
Consider this: 90% of structural failures in industrial settings are fatigue-related, which means understanding how a vendor manages defect risk and surface quality is absolutely critical. This isn’t being overly cautious, it’s the difference between a part that performs and one that fails when it matters most.
Understanding actual costs for custom 3D printing San Francisco
Now that you understand the technical factors, let’s decode the cost structure because “starting at $X” quotes rarely tell the full story.
Transparent pricing begins with knowing exactly what drives up your per-part cost beyond the advertised base rate.
Cost drivers that catch most customers off guard
Material volume plus waste, machine time, support structures, post-processing labor, inspection procedures, and packaging all add cost. Request itemized quotes separating print cost, finishing, and shipping.
Now that you know where hidden costs lurk, here are proven strategies to reduce expenses without sacrificing part performance or quality.
Hollowing resin parts with strategically placed drain holes, optimizing wall thickness, splitting oversized parts, switching materials, and adjusting infill percentages can all trim costs significantly. Make “cost-saving alternatives” a standard request during the quoting process.
Final thoughts on selecting your San Francisco printing partner
Choosing the right service means matching your project requirements to a vendor’s actual capabilities, not their website promises. Evaluate process fit, material options, tolerance confidence, finish quality, turnaround reliability, and pricing transparency.
Request samples, ask for DFM feedback, and confirm reprint policies before committing. San Francisco’s local advantages only matter if you partner with a shop that delivers on speed, quality, and communication. Don’t settle for “close enough” when the right partner saves you time, budget, and frustration.
Your most pressing San Francisco 3D printing questions, answered
How much does a 3D printing service in San Francisco typically cost per part?
Expect anywhere from $20 for straightforward FDM parts to several hundred dollars for SLS, MJF, or metal prints. Material choice, part size, finishing requirements, and tolerance specifications all influence the final quote.
How long does 3D printing take in San Francisco for prototype work?
FDM parts often complete within one day, SLA typically takes two days, MJF runs about three days, and metal printing usually requires five business days, depending on shop queue and part complexity.
What’s the strongest 3D printing method for functional parts: SLA, SLS/MJF, or FDM?
SLS and MJF produce the strongest functional components using nylon, with no support structures required and excellent mechanical properties. FDM works adequately for less-demanding applications, while SLA excels at detail but not durability.
What file format should I send to a 3D printing company in San Francisco?
Send STL or 3MF files for mesh-based prints and STEP files when engineering accuracy and precise quoting matter. Always verify manifold geometry, wall thickness, and clearances before uploading.